
The Histogram – Shooting to the right
Shooting to the Right.

Continuing on from my very previous post… in March 2025… On the Histogram.
Shooting in raw indicates that you plan to edit your images later. Raw images rarely look good straight out of camera, so they really do need editing, and the raw format gives you a lot of latitude to do this.
When shooting raw you should explore “Shooting to the right”. Meaning, push your histogram as far right as you can without “clipping” the highlights. Of course your preview will look washed out and almost devoid of colour and highlight detail, sometimes the highlights will look blown out. Ignore this…
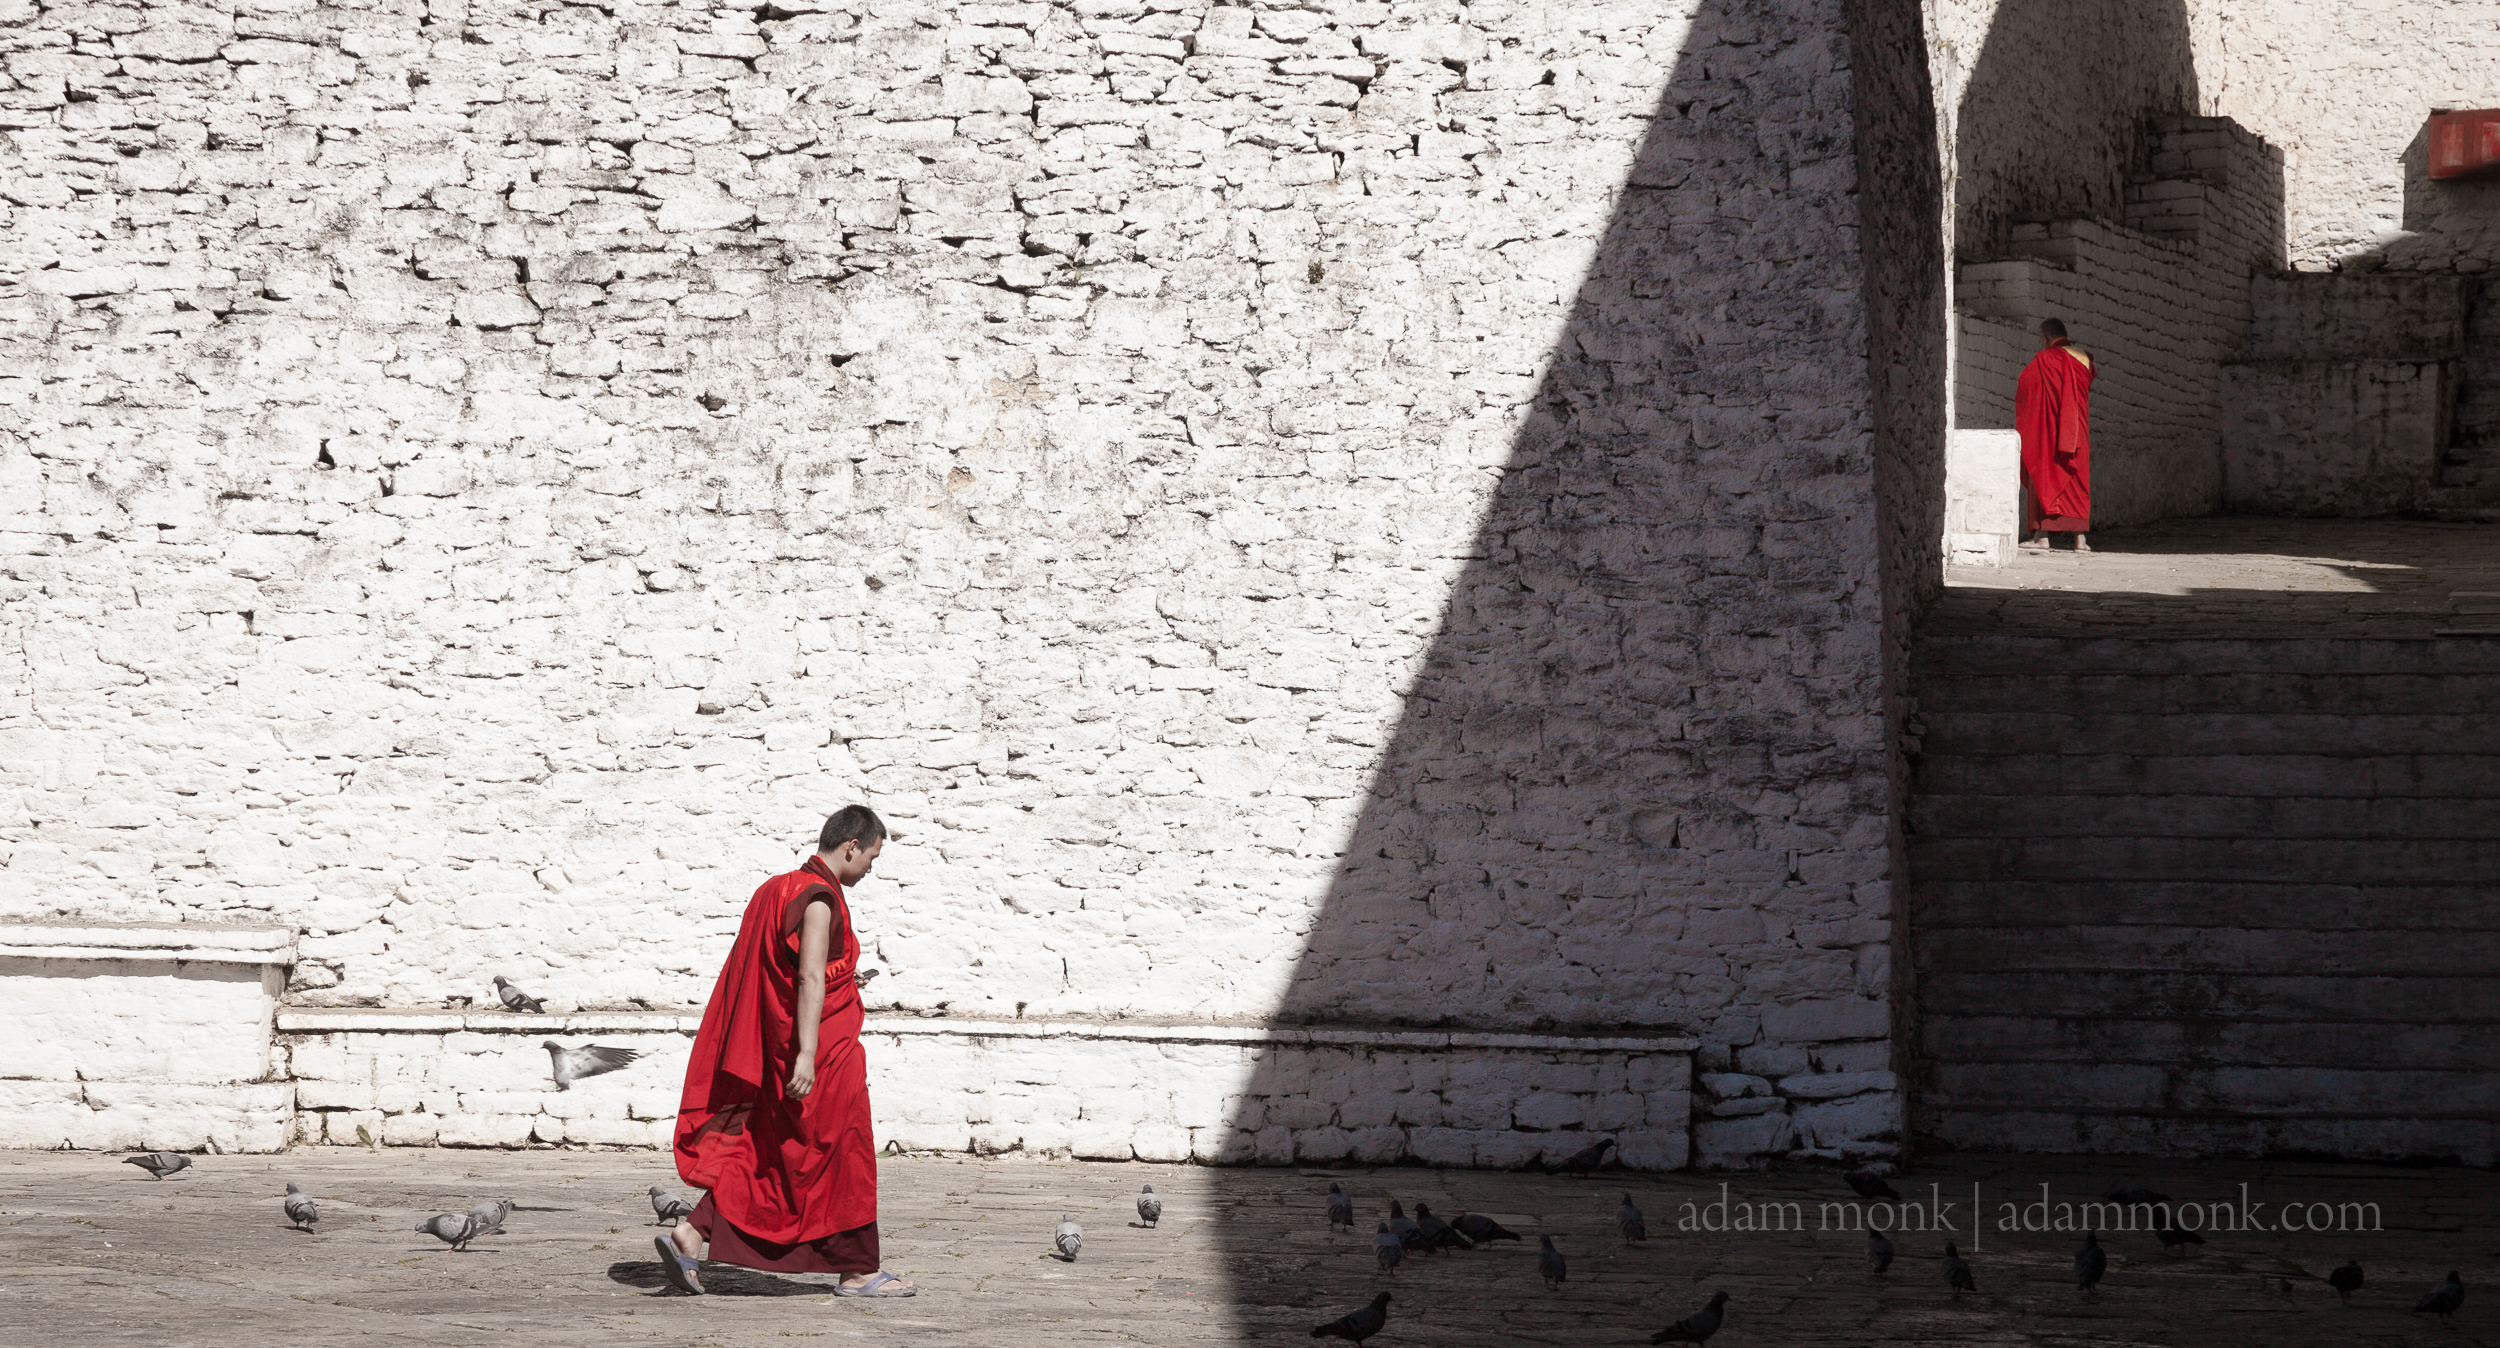
… As long as the Histogram shows detail in the highlights (not clipping) you will be able to pull down the exposure in post production and the colours and highlight detail will miraculously return, with the added benefit of lots of shadow detail to play with and significantly reduced noise.
Above is the unprocessed raw file, with highlights that look totally lost and shadows that look very dense. Below is the finished image with about 5 minutes work in Lightroom (yes I know it’s rough, but you get the idea…).
Because the histogram (preview on the camera) showed no clipping in the highlights I was able to increase the exposure, pushing the histogram to the right and thereby pushing up the highlights. This in turn allowed more detail back into the shadows. If I was just relying on the preview jpeg, or the image I saw in the viewfinder I would have reduced exposure to make the highlights look better and I would have lost the shadows completely.
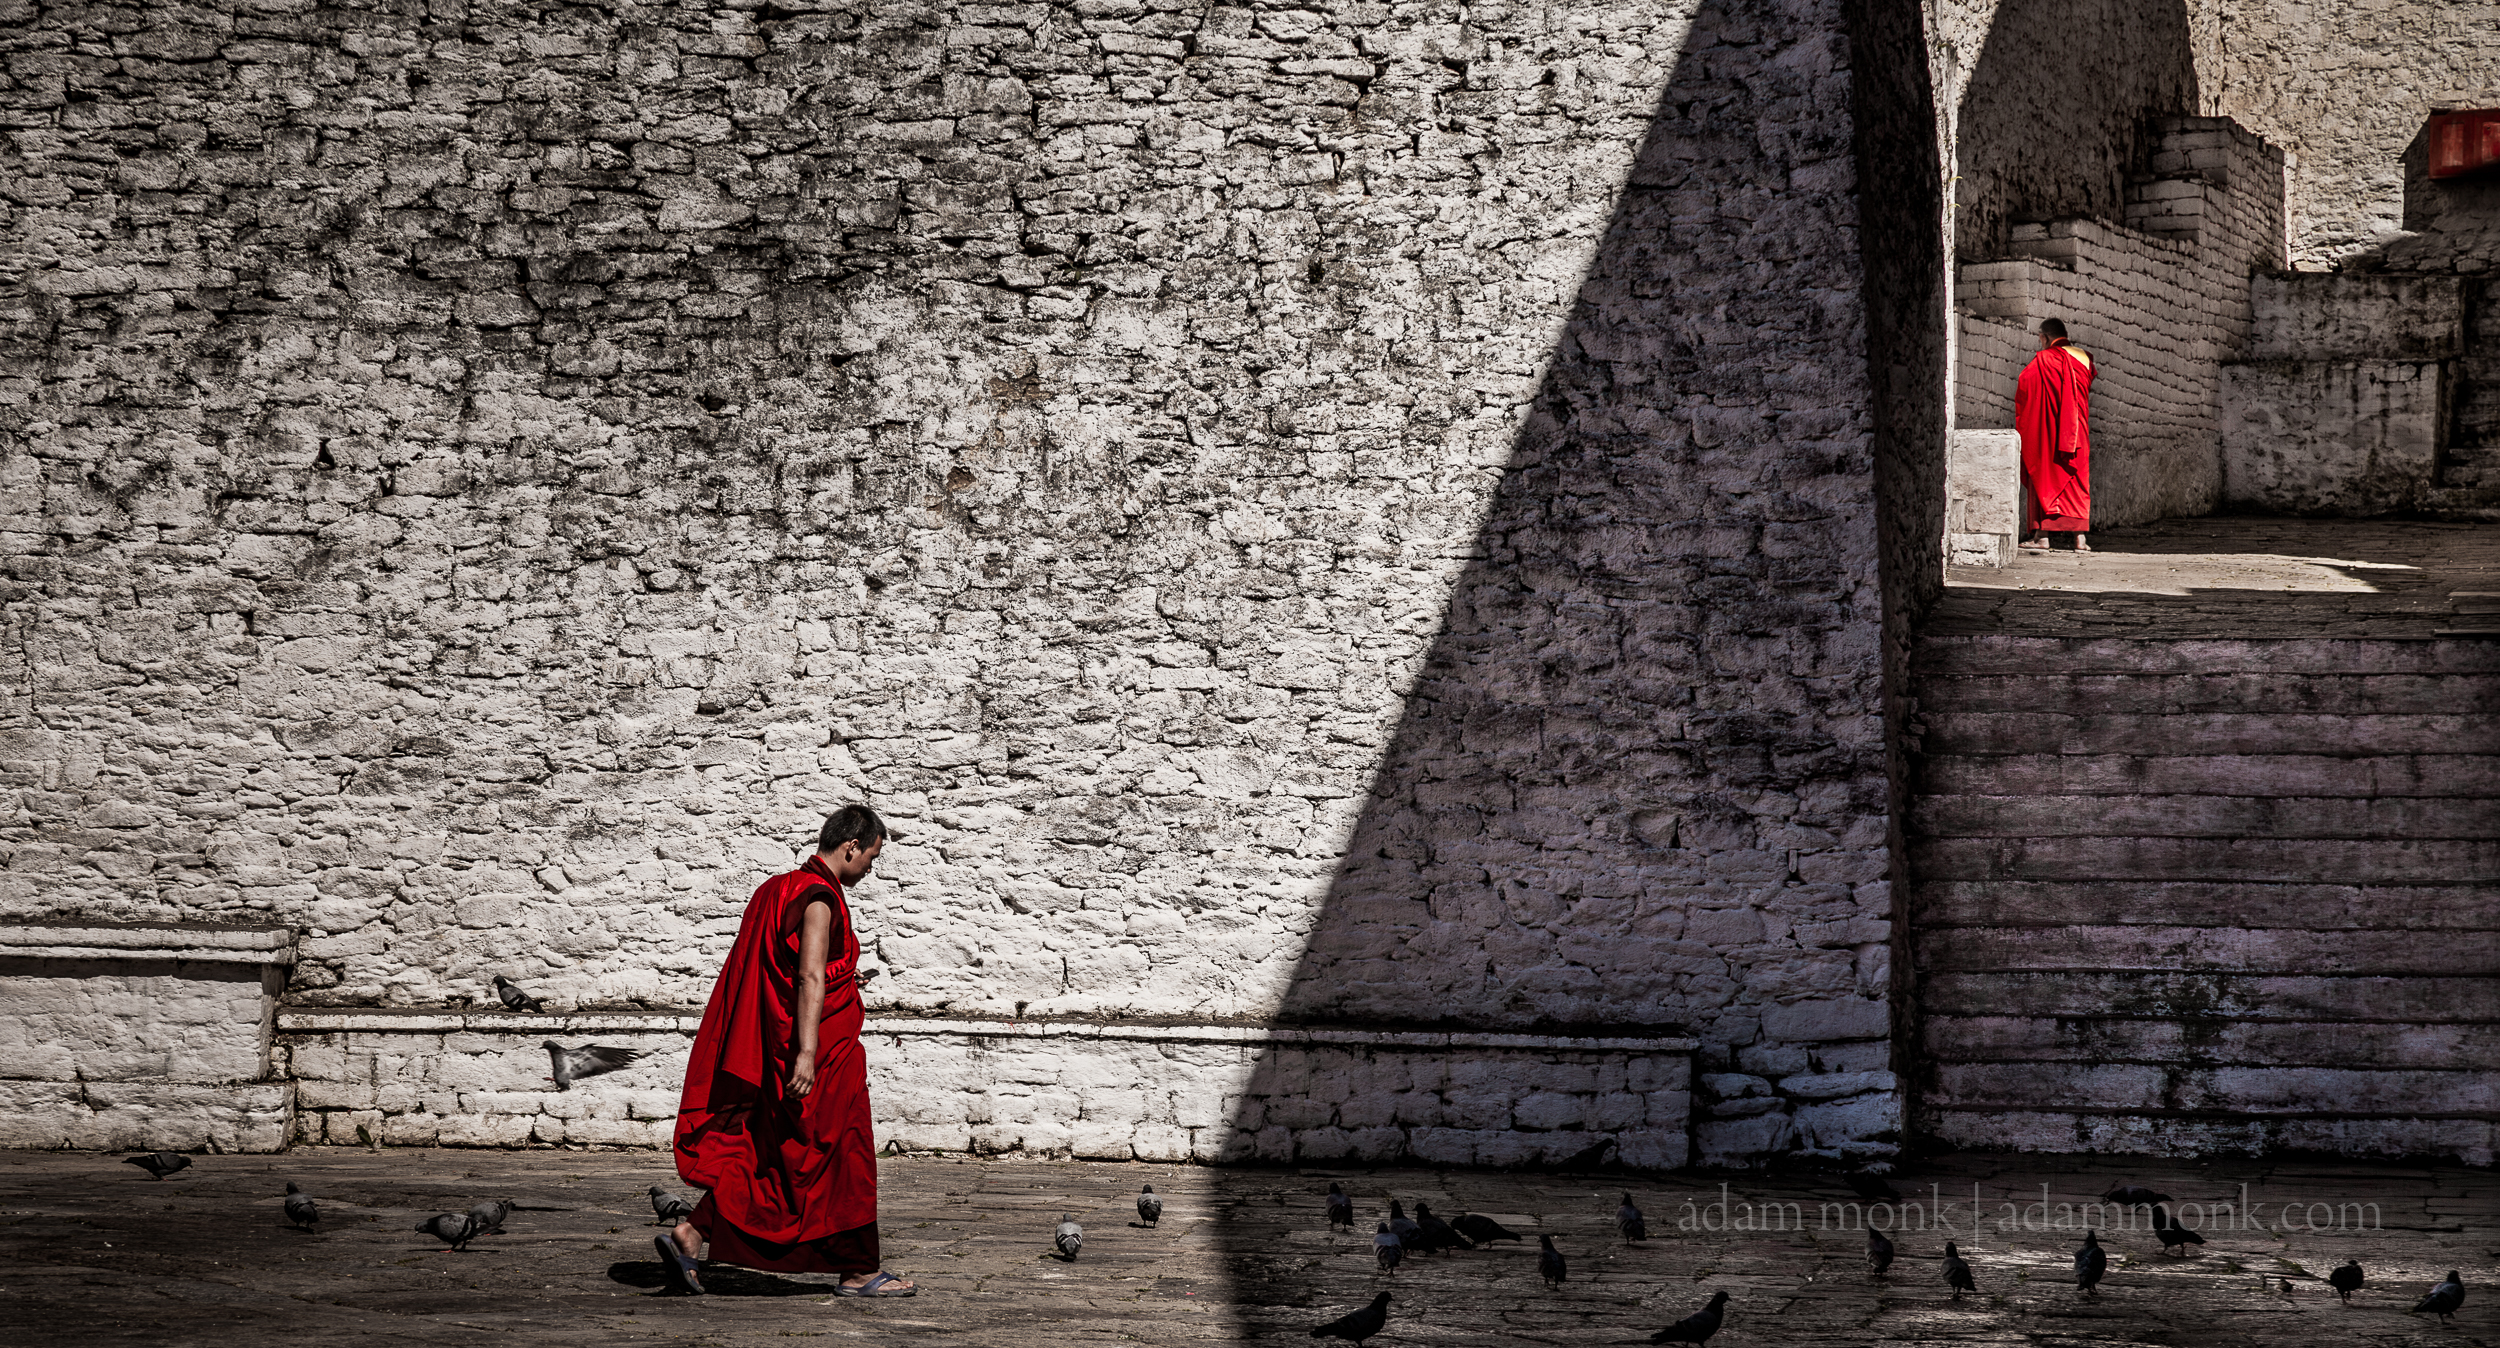
With practise this will become second nature and you will do it without much thought. Your image hit rate will improve dramatically, and you won’t have so many “almost but not quite” images, at least not because of fluffed exposures.
Reduced Noise..? Why? Signal to Noise Ratio
Why would “Shooting to the right” reduce visible noise in your image?
Digital noise is always around in the background on your sensor, it’s like the hiss you hear in the speakers of a PA (public address system, not personal assistant) when nobody is speaking. Audio noise, just like digital image noise is a product of the electronic circuits of the amplifier, audio or visual. The hiss you can hear is always there, but when someone starts talking through the microphone you don’t notice it anymore.
The stronger the signal, the less noise you hear. Or, for digital cameras, the stronger the signal the less noise you see.
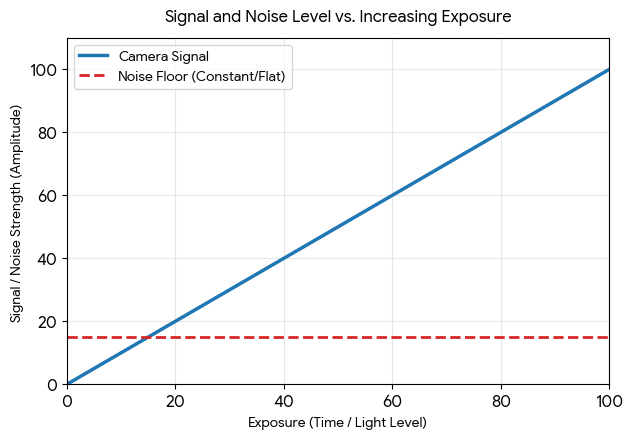
In the simple graph below signal/noise is plotted in the vertical axis, while exposure is on the horizontal, starting from zero on the left and increasing to the right.
- The numbers on the graph are arbitrary, just representing levels of exposure increasing as you move to the right, and resulting signal strength as the you go up.
- The noise remains almost constant regardless of exposure (assuming constant ISO).
- At low levels of exposure the noise overwhelms the signal.
- The signal increases as a direct result of increasing exposure – more light to the sensor – and rapidly exceeds the noise level.
- The point where the two lines (noise and signal) intersect is where the details begin to be visible in the shadows… this point will still be very noisy if you try to increase the brightness (exposure slider) in Lightroom.
So how does this translate to your camera?
In your camera the noise becomes more visible as you reduce the light entering the lens, the signal to noise ratio reduces, so the noise becomes “louder” than your image signal. This usually happens in shadows or when shooting in low light (long exposure or high ISO), and becomes prominent when you under-expose all or part of your shot.
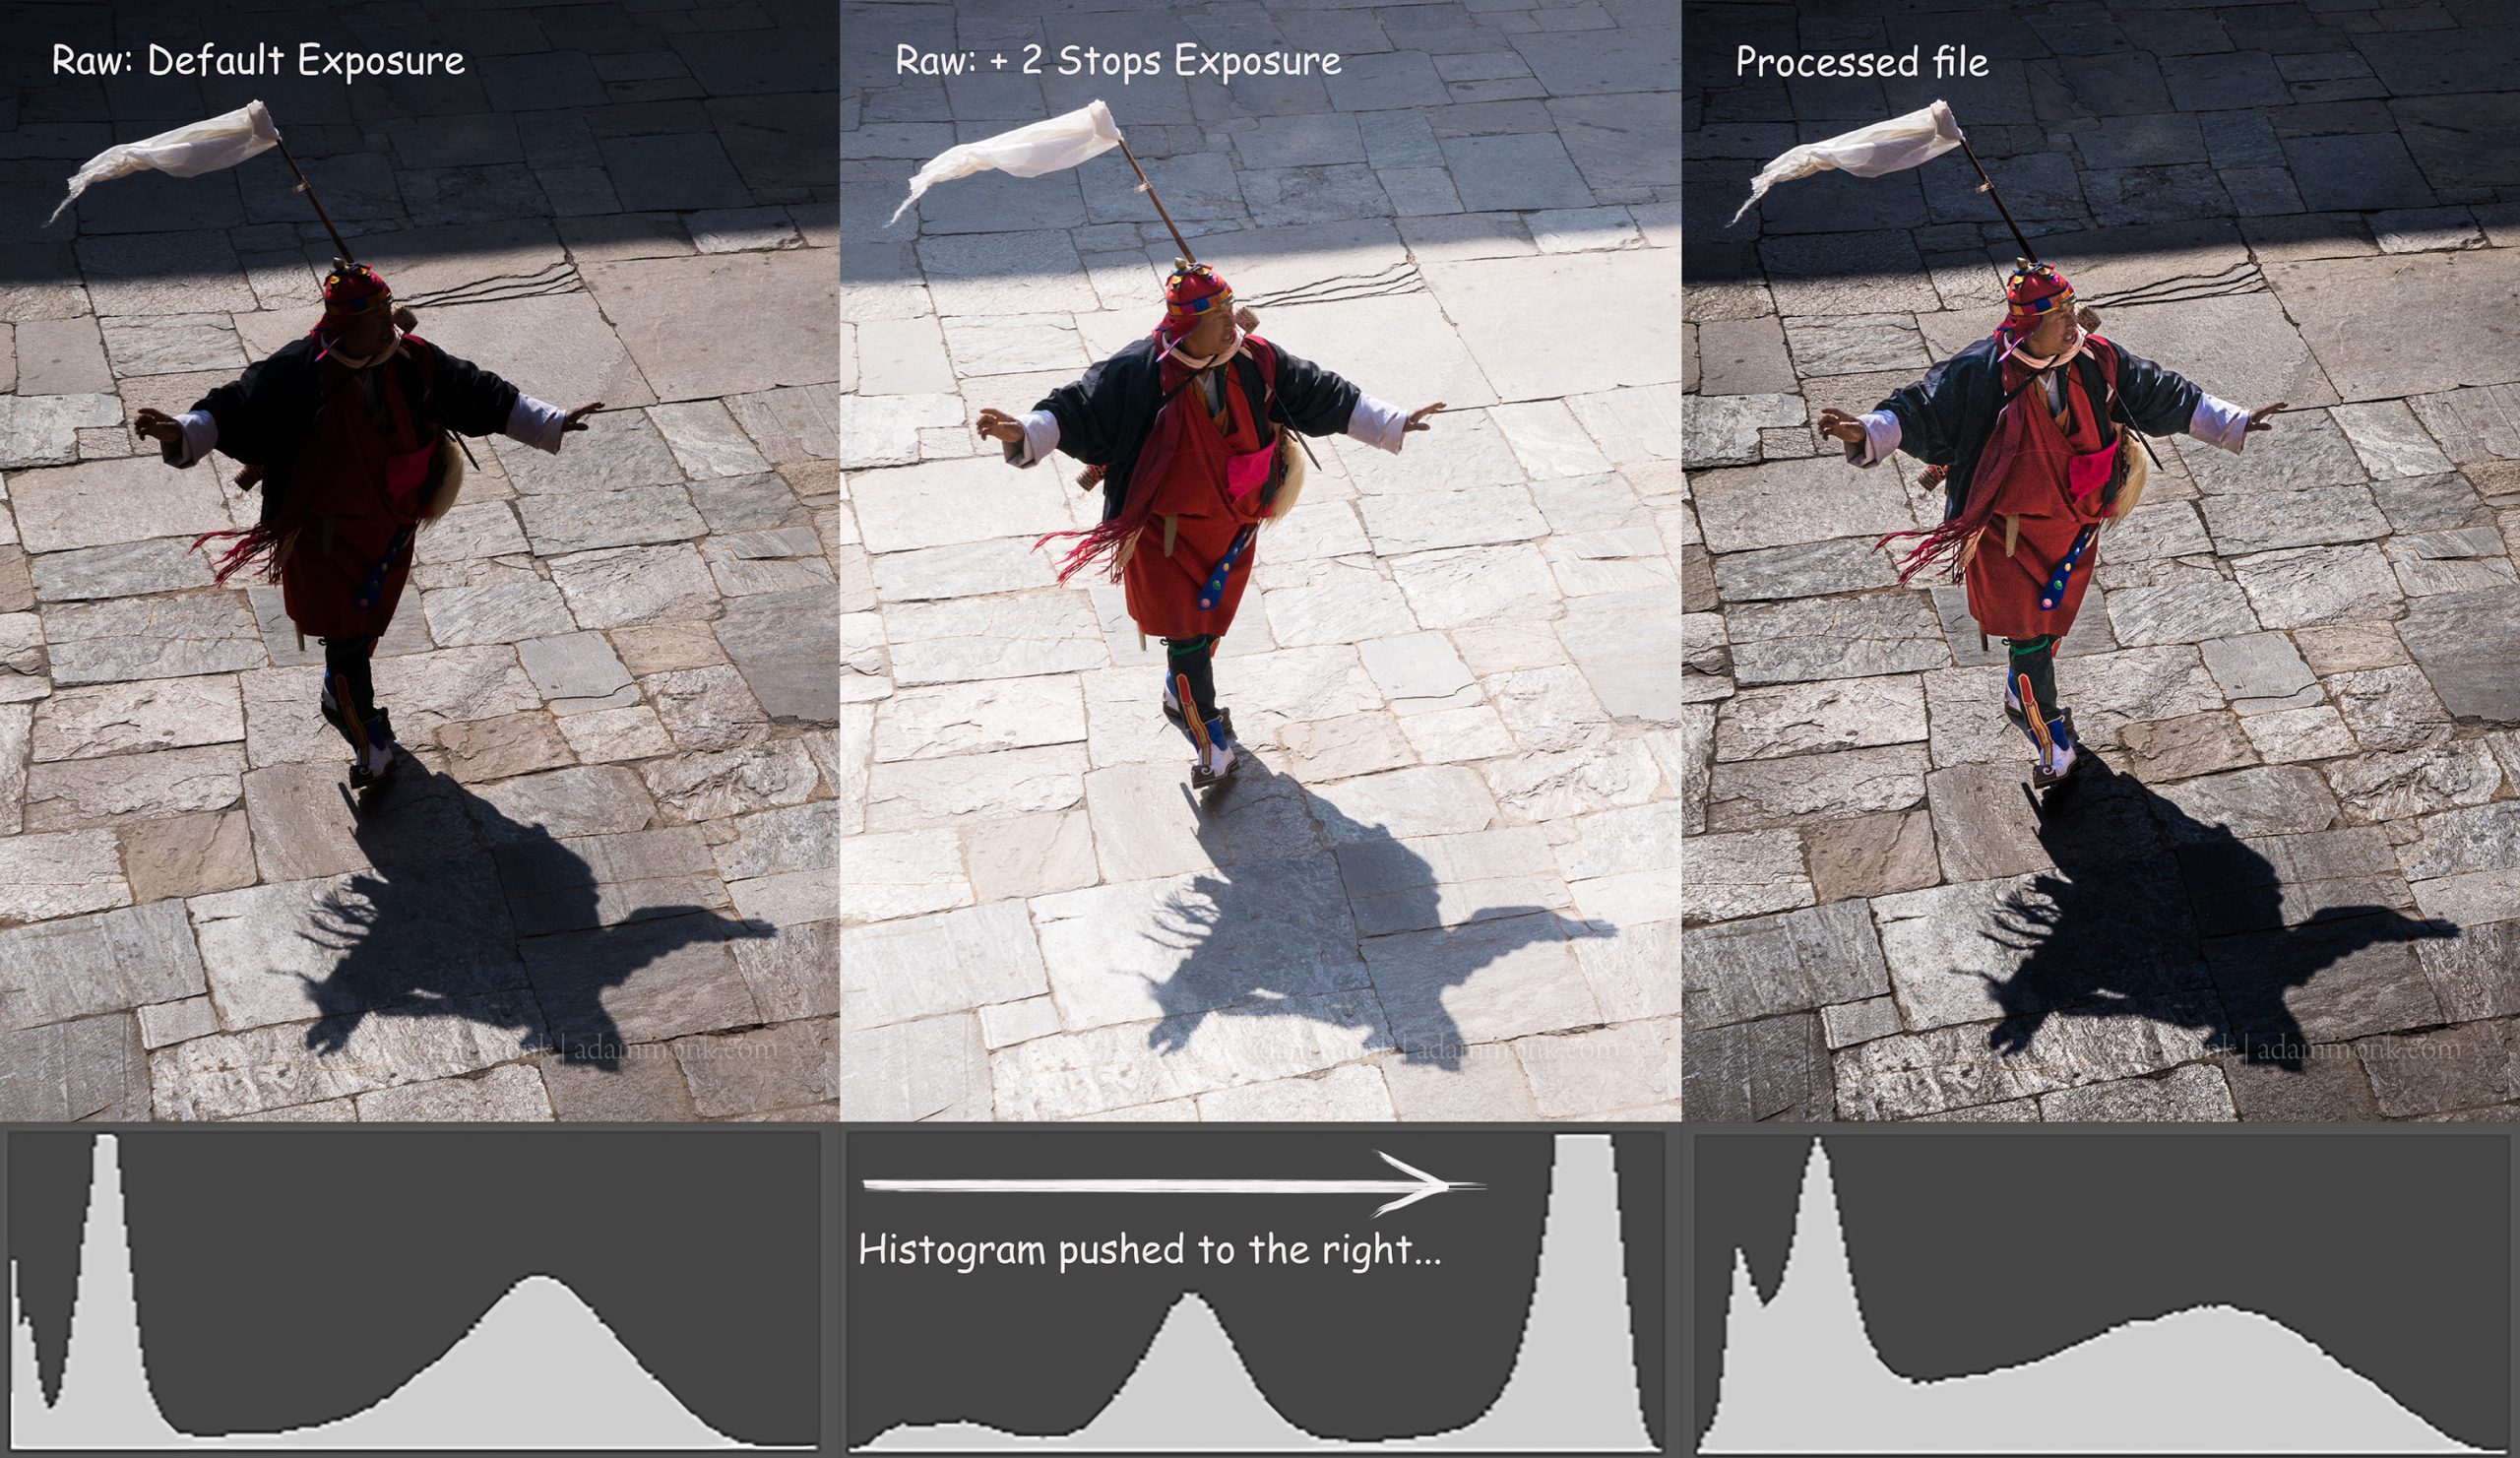
In other words, when your histogram is pushed to the left. Look at the images below with their corresponding histograms.
- To avoid noisy shadows you need to increase your signal to noise ratio by pushing your histogram as far to the right as you can…
- Without clipping the highlights.
- In your camera preview screen your shadows may start to look like bright mid tones
- The light areas of your shot may even look featureless white
- But provided your histogram shows there is no clipping in the highlights, all the detail is there waiting to be revealed in post production.
Why do I need so much shadow detail?
Big black shadows that lack any detail rarely look good, how much detail needed depends on the image and your creative style.
When you “Shoot to the right” you will naturally gain more shadow detail. How much depends on how much light is around in your shot generally, sometimes shadows will end up looking like bright mid tones, as with the centre raw image above, where the preview image looks awful. Ignore this too, just make sure you haven’t clipped the highlights by checking the histogram.
When you edit the image you can reduce the shadow brightness back to where it belongs, as a shadow. As you push the exposure slider down, any noise in the shadows will effectively vanish (as your signal is much “louder” than the noise), and the shadows will retain detail. Something that is vital in almost every image, especially when you print it – See This Post about printing.
Shooting to the right, brightening your exposure, is the most effective noise reduction you can do, and it is completely lossless! Unlike the algorithmic noise reduction (and now AI…) we apply in post, that can’t actually differentiate between fine detail and noise.
Conclusion
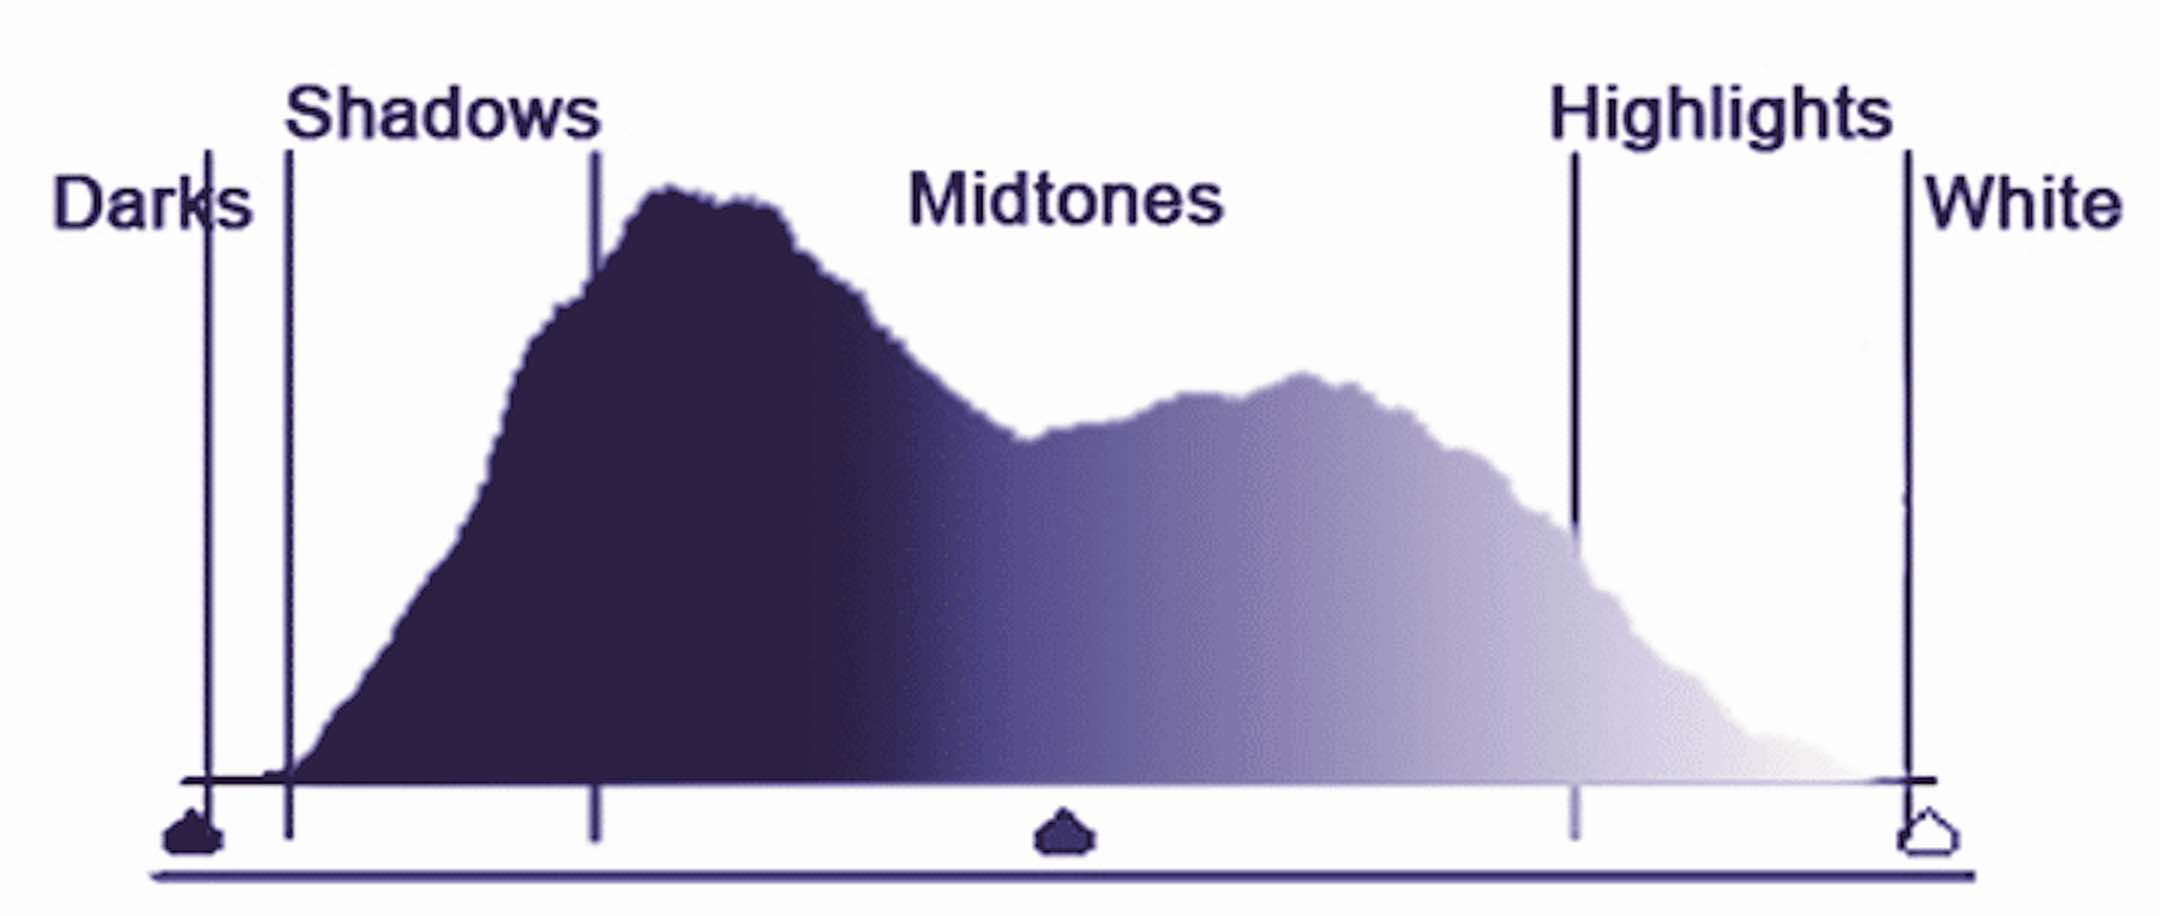
This is why the Histogram is your best photographic friend, and why you should be using it. If you’re not familiar with it yet, it can be a challenge to get used to it, but it’s worth going through the process. When you look at the back of your camera you should glance at the preview image to check your composition, but for exposure you should be looking at the histogram.
In the next post I will turn all this on its head and explain why with proper use of the histogram you almost never need to bracket images, even in difficult light.
